

Maze Generation Using BFS Part 1: The Coordinate Structure
- Jul 8, 2017
- 3 min read
In this post I will be going over concepts of creating a random maze generator in Gamemaker Studio 2 using Breadth First Search to ensure that all free spaces are accessible within the map. While probably not the most efficient method, you will learn to create a type of Struct in Gamemaker to hold a pair of coodinates, how to use a Breadth First Search algorithm, and apply Fisher-Yates shuffling algorithm.
The first thing we will need to accomplish is creating the ability to store a reference to multiple data values at a single "array index". (We want to do this to be able to pull a random Coordinate out of an array and attempt to place a block in that position) In many languages you could create an "Object" or "Struct" that can store multiple pieces of data. You would then store a reference to this object into a variable or specific array index.
For Example:
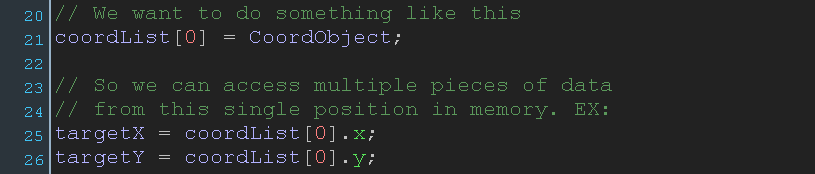
Using this method it is easy to retrieve a pair of coordinate points from a single index of coordList array. Now we could create a Gamemaker Object but this holds a couple of issues that we want to avoid. A Gamemaker object stores about 54 (or more) instance variables on creation. Knowing that GM stores our data as 16 byte values no matter what the Data Type is this adds up to at be least... a whopping 864 bytes of data. For simple comparison, an empty object in Java is probably less than 10 bytes. On top of the data stored Gamemaker will run the draw event for each object as well as checking the step loops. This is a huge downfall of GML as a language, it prevents us from creating efficient data structures. We could deactivate the instances to avoid this, but lets look at a simple alternative.
Building the coordinate structure
So the bottom line is that give 1 index we want to be able to access 2 values. This is something that can be easily done using 2D arrays. The only problem this brings into our code is that using a 2D array for the algorithms that we want to build will get pretty messy, so we can simplify how we interact with these arrays by building a simple structure with GM Scripts and Functions.
First lets go over how we can store these coordinates (x, y) into a 2D array and access them by using 1 index position. Below is a small example of what we want.

As you can see, given "position = 0", we can access to subsequent elements of data representing our x and y value. Each unique "position" value will represent a pair of coordinates. This is how we will create our "coordinate structure", so lets get started.
Step 1 - Initialize our coordinate array
Wouldn't it be nice if the index that represents the X and the Y was a bit easier to read than 0 and 1? Well we can take care of that using GM Macro's, or constants. A macro is stored globally meaning after initialization we can access them from any instance in any room! So lets create our first script. Call it InitializeCoordList.
Lets define our Macro in this Script:

Now don't type this next part, but view it as an example on how these Constants are used in our structure:

A bit easier to read eh? It will also make it easier to retrieve our wanted coordinates later on. So next in our InitializeCoordList script we will just want to declare our array and create a variable holding the size of our Coordinate list (how many coordinates we are storing).
Note that I use _variable inside of scripts that will not be accessed often. The is to prevent duplicate variable naming later on, add our final two lines resulting in our entire Initialization Script being finished!

Step 2 - Adding coordinates to our array
So we have initialized our _coord array structure. The next thing we want to be able to do is easily add coordinates to our array. For this we can create another Script and name it AddCoordinate. If you remember previously our structure has the format _coord[coordPos, XorY]. So all we need to do inside of our Script is take in two parameters.. Our X and Y value we want to store. We store these two arguments in their respective 2nd dimensional indices. After storage we increase our _coordListSize by 1. You can see how I use _coordListSize++, this increases the value AFTER the assignment has been complete.

We are now finished with our AddCoordinate function. It can be used as AddCoordinate(X, Y) and the Script now takes care of the rest! Next we will be creating the GetCoordinate(pos, XorY) function!!!
To be continued.....
Comments